Introduction
Getting your first property listing ready can feel overwhelming.
You may have a folder full of interior photographs, exterior images, drone shots, and perhaps hundreds of files from a professional real estate photographer. The property may look excellent in person, but the photographs might appear darker, brighter, flatter, or less consistent than expected.
That is normal.
Taking a property photograph is only one part of the real estate photography process. Photo post-production is often needed to prepare those images for online property listings, brochures, websites, social media, and other marketing materials.
This does not mean every photograph needs dramatic editing.
For most property listings, the goal should be to create images that look clean, bright, natural, consistent, and representative of the actual property.
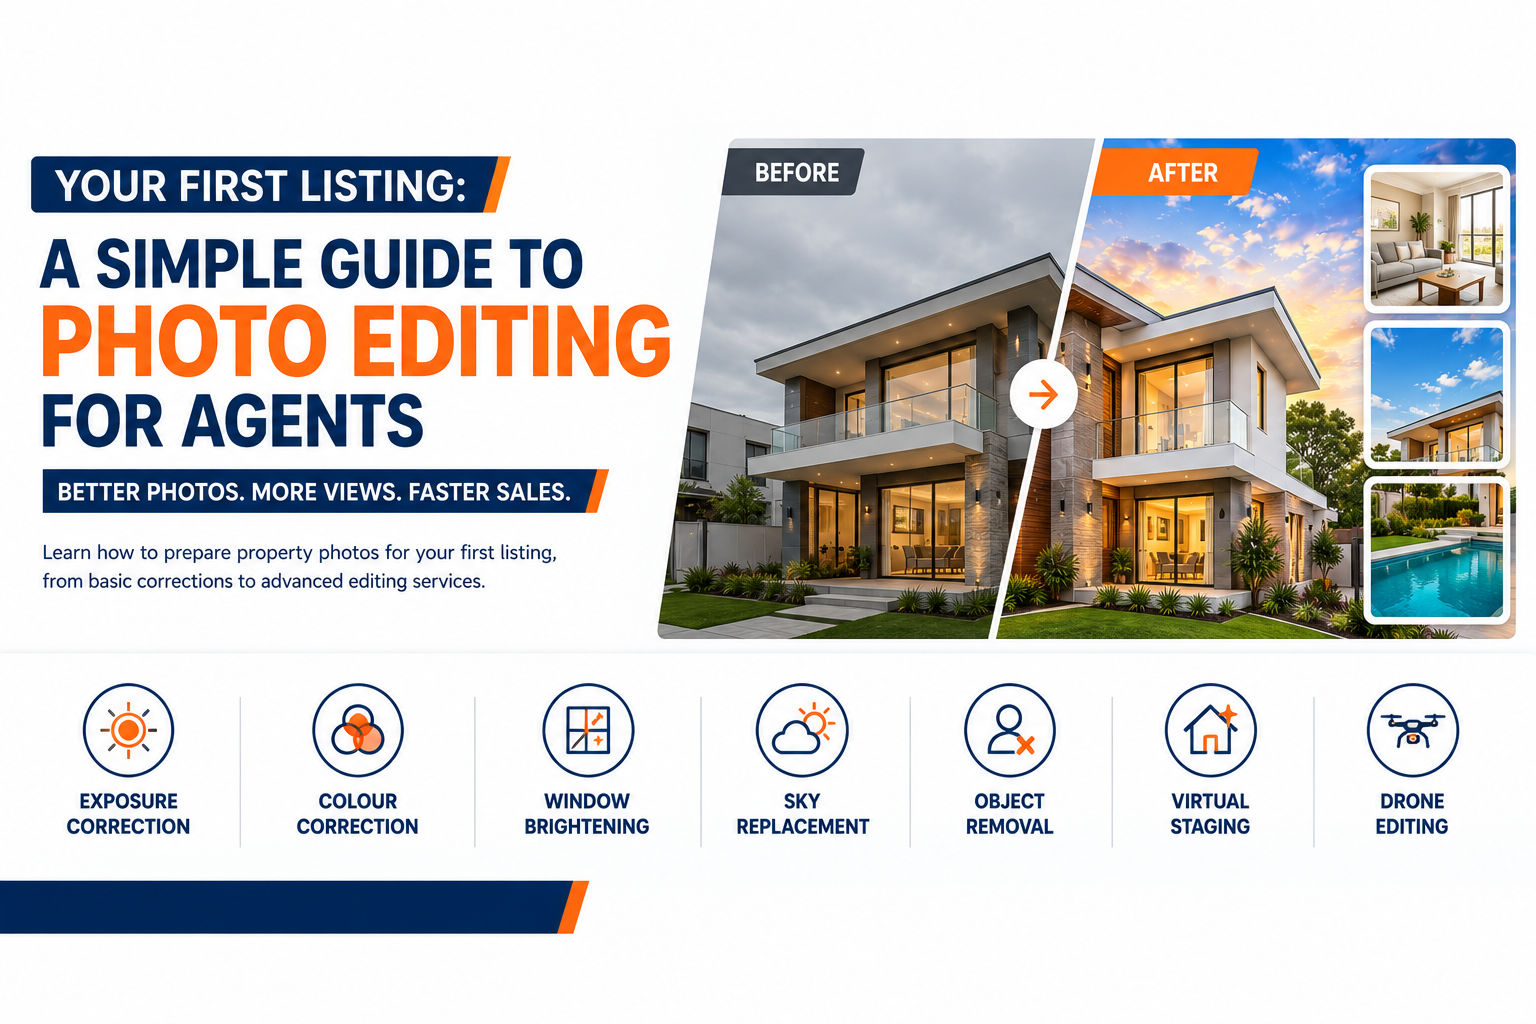
Basic editing may include exposure correction, white balance, colour correction, contrast adjustment, highlight and shadow recovery, and lens correction. Depending on the property and the original photographs, more advanced services may include window brightening, view replacement, sky replacement, object removal, perspective correction, virtual staging, or drone photo editing.
For a new agent, the important question is not simply, “How do I edit real estate photos?”
It is:
“What editing does my listing actually need?”
This guide explains the process from beginning to end so you can confidently prepare your first property listing.
1. Why Do Real Estate Photos Need Editing?
A property can look completely different in person compared with how it appears in a camera.
Interior photography can be affected by:
- Uneven lighting
- Bright windows
- Dark corners
- Mixed colour temperatures
- Camera exposure
- Lens distortion
- Reflections
- Shadows
Exterior photography can have different challenges:
- Flat skies
- Harsh sunlight
- Shadows
- Overexposed areas
- Distracting objects
- Uneven colours
- Perspective distortion
This is why real estate photography post production is an important part of preparing listing images.
The purpose of editing is not to change the property.
Instead, editing should help the photograph communicate the property more effectively.
For example, an editor might correct a slightly yellow interior, recover detail from a bright window, straighten architectural lines, or remove a distracting rubbish bin from an exterior photograph.
These are improvements to the photograph rather than changes to the underlying property.
2. What Should Basic Property Photo Editing Include?
If you are preparing your first listing, start with the fundamentals.
Exposure Correction
Exposure controls how bright or dark the photograph appears.
An interior photograph may be slightly underexposed, while a room with large windows may contain both very bright and very dark areas.
The editor can balance the exposure while preserving important details.
White Balance
White balance helps correct unwanted colour temperature.
For example, an interior photograph may appear:
- Too yellow
- Too blue
- Too green
Correct white balance helps walls, flooring, furniture, and other surfaces appear closer to their natural appearance.
Colour Correction
Colour correction can improve overall consistency.
The objective is not necessarily to make every photograph highly saturated.
Instead, the editor may adjust:
- Hue
- Saturation
- Vibrance
- Contrast
- Highlights
- Shadows
- Individual colour channels
Highlight and Shadow Recovery
Bright areas can sometimes lose detail, while dark areas may hide important features.
Careful adjustment can reveal more information without making the image appear artificially flat.
Lens Correction
Wide-angle property photography can introduce optical distortion.
Lens correction can help reduce unwanted distortion and improve the appearance of architectural lines.
These basic adjustments form the foundation of professional property photo editing.
3. RAW vs. JPEG: Does It Matter?
If your photographer provides RAW files, they generally contain more editable image information than a compressed JPEG.
RAW files can provide greater flexibility for adjustments involving:
- Exposure
- White balance
- Highlights
- Shadows
- Colour
- Tonal range
JPEG files can still be edited effectively, particularly when the original exposure and image quality are good.
As an agent, you do not necessarily need to understand every technical detail of RAW processing.
The important thing is to ask your photographer or editor what format they prefer.
For professional workflows, providing the highest-quality original files available generally gives the editor more flexibility.
4. How Are Interior Real Estate Photos Edited?
Interior photographs often require more careful post-production because indoor lighting can vary significantly.
Consider a living room with:
- Natural light from windows
- Ceiling lights
- Warm lamps
- Reflective flooring
- Dark furniture
Each light source can affect the colour and brightness of the photograph.
A professional property photo editing and retouching service may use a combination of:
- Exposure correction
- White balance
- Colour correction
- HDR blending
- Highlight recovery
- Shadow adjustment
- Window masking
- Perspective correction
- Lens correction
- Object removal
The objective is to create a balanced image while preserving the property's real appearance.
Example
Imagine a kitchen where the cabinets look slightly yellow, the windows are extremely bright, and the floor appears too dark.
A professional edit can balance these areas so the viewer can see the kitchen more clearly without making the room look completely different from reality.
5. How Are Exterior Property Photos Edited?
Exterior photographs require a different approach.
The editor may focus on:
- Building exposure
- Sky balance
- Landscaping
- Colour
- Shadows
- Architectural lines
- Driveways
- Roads
- Outdoor distractions
Exterior enhancement can help the property stand out while maintaining realistic colours and textures.
Depending on the photograph, additional services may include:
- Sky replacement
- Object removal
- Lawn enhancement
- Window correction
- Perspective correction
- Colour balancing
For luxury properties, exterior photographs may require particularly careful treatment because architectural materials, landscaping, glass, stone, wood, and other surfaces need to retain realistic textures.
6. What Is HDR Blending?
HDR stands for High Dynamic Range.
In real estate photography, multiple exposures may sometimes be captured at different brightness levels.
One exposure may show the interior correctly.
Another may contain better window detail.
A third may preserve darker areas.
HDR blending combines useful information from multiple exposures to produce a more balanced final photograph.
The important word is balanced.
Poor HDR processing can produce:
- Excessive halos
- Over-saturated colours
- Flat-looking images
- Unrealistic brightness
- Heavy contrast
Professional editing should aim for a natural result rather than an obviously processed HDR appearance.
7. When Should You Use Window Brightening or View Replacement?
Windows can be one of the most difficult elements in interior property photography.
If the room is exposed correctly, the outside view may become too bright.
If the window view is exposed correctly, the room may become too dark.
This is where window brightening and view replacement can be useful.
Window Brightening
The editor balances the window area so that the glass and surrounding room look more natural.
View Replacement
If the original exterior view is severely overexposed or unsuitable, a replacement view may sometimes be used.
For example, the outside scene may be replaced with a suitable sky, landscape, or city view.
However, view replacement should be handled carefully.
The replacement should be believable and should not falsely communicate a view that the property does not actually have.
Agents should tell the editor if a view must remain completely unchanged.
8. When Is Sky Replacement Appropriate?
Exterior property photographs can sometimes be affected by:
- Grey skies
- Overcast conditions
- Flat lighting
- Distracting skies
- Poor weather conditions
A carefully selected sky can improve the visual presentation of the image.
Sky replacement is particularly common in property marketing because the sky occupies a significant portion of some exterior photographs.
However, the replacement should match:
- Lighting direction
- Perspective
- Colour temperature
- Shadows
- Weather conditions
- Overall scene brightness
A dramatic sunset should not suddenly make an ordinary daytime photograph look like it was photographed at night unless the image is intentionally being presented as a twilight-style marketing visual.
Natural-looking enhancement should remain the priority.
9. When Should Objects and Clutter Be Removed?
Small distractions can take attention away from a property.
Examples include:
- Rubbish bins
- Cars
- Cables
- Wires
- Signs
- Construction debris
- Small unwanted objects
- Photographic equipment
- Temporary items
Object removal can help clean up the photograph.
However, not every object should automatically be removed.
A professional editor should understand the difference between:
Removing a temporary distraction
and
Removing an important feature of the property.
For example, removing a temporary rubbish bin may be reasonable.
Removing a permanent building feature simply because it is unattractive would be a different matter.
Agents should clearly communicate what may and may not be changed.
10. Why Perspective and Vertical Correction Matter
Real estate photographers often use wide-angle lenses to capture more of a room.
This is useful, but wide-angle photography can make vertical architectural lines appear tilted.
Walls, doors, windows, and cabinets may appear to lean.
Perspective correction and vertical correction can help restore a more natural appearance.
This is particularly important for:
- Buildings
- Apartments
- Kitchens
- Commercial properties
- Luxury interiors
- Architectural photography
Straight architectural lines can make property images appear more professional.
11. What About Drone and Aerial Property Photos?
Drone photography gives buyers a different perspective of a property.
Aerial photographs can show:
- Property boundaries
- Gardens
- Pools
- Driveways
- Neighbourhood context
- Building position
- Surrounding land
But drone photographs can also require post-production.
A real estate drone aerial photo editing service may include:
- Exposure correction
- Colour balancing
- Sky enhancement
- Object removal
- Perspective adjustments
- Landscape enhancement
- Image consistency
The goal is to make aerial photographs fit naturally with the rest of the property listing.
For example, if interior photographs have a soft, natural colour treatment but the drone image is heavily saturated, the listing may feel inconsistent.
12. When Should You Use Virtual Staging?
Virtual staging is different from ordinary photo enhancement.
Instead of simply correcting an existing photograph, virtual staging adds digital furniture and décor to an empty room.
It can be useful for:
- Vacant apartments
- Empty villas
- Newly constructed properties
- Investment properties
- Unfurnished homes
- Developer marketing
A living room can be digitally furnished with:
- Sofa
- Coffee table
- Rug
- Lighting
- Artwork
- Plants
- Television unit
A bedroom can be furnished with:
- Bed
- Bedside tables
- Lamps
- Artwork
- Curtains
- Accessories
Virtual staging should preserve the room's architecture and realistic proportions.
It should also be clearly identified as virtually staged where appropriate so buyers understand that the furniture shown is digitally added.
13. What Makes an Edited Property Photo Look Professional?
Professional editing is not necessarily about making an image look dramatic.
In real estate photography, natural-looking enhancement is often more valuable.
A professional image should generally have:
Balanced brightness
The photograph should not be excessively dark or bright.
Natural colours
Walls, floors, furniture, landscaping, and other materials should retain believable colours.
Straight architectural lines
Doors, walls, windows, and buildings should not appear unintentionally tilted.
Realistic windows
Window areas should retain believable interior and exterior lighting.
Controlled contrast
Too much contrast can make a property appear harsh.
Consistent editing
Photographs from the same property should look like they belong to one listing.
Clean presentation
Distracting temporary objects should be removed where appropriate.
Accurate representation
The final image should not create a false impression of the property.
This is the difference between photo enhancement and excessive manipulation.
14. How Should Agents Communicate Editing Requirements?
Clear instructions can save time and reduce revisions.
When sending photographs to an editor, provide information such as:
Property type
For example:
- Apartment
- Villa
- Independent house
- Office
- Commercial building
- Land
- Luxury property
Intended use
Tell the editor whether the images are for:
- Property listing
- Website
- Brochure
- Social media
- Advertisement
- Developer presentation
Editing requirements
Specify what you need:
- Basic enhancement
- Colour correction
- HDR blending
- Window brightening
- Sky replacement
- Object removal
- Perspective correction
- Virtual staging
- Drone editing
Style preference
For example:
- Natural
- Bright
- Modern
- Luxury
- Neutral
- Warm
Important restrictions
Tell the editor what must remain unchanged.
For example:
“Keep the existing flooring and wall colour. Remove the temporary boxes and balance the window exposure.”
This is much clearer than simply saying:
“Make it look better.”
15. How to Review Edited Photos Before Publishing
Never publish a large batch without reviewing the final images.
You do not need advanced Photoshop knowledge.
Use a simple checklist.
Check 1: Does the property still look like the property?
Compare the edited photograph with the original.
Check 2: Are the colours natural?
Look at:
- Walls
- Floors
- Cabinets
- Furniture
- Exterior surfaces
- Landscaping
Check 3: Are windows realistic?
Make sure the window area does not look artificially dark or bright.
Check 4: Are architectural lines straight?
Check:
- Walls
- Doors
- Windows
- Cabinets
- Building edges
Check 5: Are removed objects actually gone?
Look for editing marks, repeated textures, or unnatural areas.
Check 6: Are staged elements realistic?
For virtual staging, check:
- Furniture scale
- Perspective
- Shadows
- Placement
- Reflections
Check 7: Are all images consistent?
The listing should not contain one image that is extremely bright and another that is noticeably dark or heavily saturated.
Check 8: Is the file suitable for publication?
Confirm:
- Resolution
- File format
- File size
- Orientation
- Naming
- Platform requirements
A final quality-control review can prevent small problems from reaching the published listing.
16. Turnaround Time, Revisions and Batch Editing
Real estate listings often have deadlines.
An agent may receive photographs today and want the property online quickly.
This makes fast turnaround real estate photo editing services attractive, but speed should not come at the expense of quality.
Before sending an order, clarify:
- Number of photographs
- Required services
- Expected delivery time
- Output format
- Resolution
- Revision policy
- Delivery method
For larger agencies, batch editing can make the process more efficient.
Instead of handling every image individually, the editing team can follow a consistent style across an entire property.
For recurring workloads, agencies may also consider an ongoing editing arrangement rather than managing each listing as a completely separate process.
17. When Should You Outsource Real Estate Photo Editing?
For a first listing, editing a few photographs yourself may seem manageable.
But as your listings increase, post-production can consume significant time.
Outsourcing can make sense when:
You do not have professional editing software
Professional editors can handle advanced workflows without requiring you to learn complex software.
You have large image batches
Editing dozens or hundreds of photographs manually can become time-consuming.
You need consistent results
A professional workflow can help maintain the same visual standard across listings.
You have tight deadlines
An established editing process can help reduce the time between photography and publication.
You are managing multiple properties
Agents and agencies can focus on:
- Clients
- Viewings
- Negotiations
- Marketing
- Listing management
while post-production is handled by an editing team.
You need specialist services
Advanced requirements such as:
- Window masking
- Sky replacement
- Object removal
- Drone editing
- Virtual staging
- Perspective correction
may be better handled by experienced editors.
The purpose of outsourcing is not simply to avoid editing.
It is to create a repeatable real estate photography post-production workflow.
18. How a Professional Editing Partner Can Support Recurring Listings
For a single listing, you may only need a small number of edited photographs.
For an agency handling multiple properties every month, consistency becomes much more important.
A professional editing partner can help establish:
Photography → File Upload → Editing Instructions → Post-Production → Quality Control → Revisions → Final Delivery → Listing Publication
This workflow can cover different image types, including:
- Interior photographs
- Exterior photographs
- Drone images
- Virtual staging images
- Detail photographs
- Marketing photographs
A consistent workflow can also establish preferred editing standards.
For example:
Interior: Natural brightness + balanced colour + realistic windows
Exterior: Natural colour + balanced sky + clean presentation
Luxury: Refined colour treatment + controlled contrast + detailed retouching
Drone: Balanced exposure + consistent colour + clean aerial presentation
This allows an agency to develop a recognizable visual standard across its property listings.
Voxelhaus Consultancy can support this type of professional post-production workflow for agents, photographers, property developers, agencies, and property marketing teams.
19. FAQs
What is real estate photo editing?
Real estate photo editing is the post-production process used to improve property photographs for listings and marketing. It can include exposure correction, colour correction, HDR blending, window brightening, object removal, perspective correction, sky replacement, and other appropriate enhancements.
Do all property photos need heavy editing?
No. Most photographs should receive only the adjustments they actually need. Natural enhancement is generally preferable to aggressive editing.
How do I edit real estate photos for my first listing?
Start with exposure, white balance, colour, highlights, shadows, and consistency. Then consider advanced services such as window brightening, sky replacement, object removal, or virtual staging where appropriate.
Should I send RAW or JPEG files?
If available, RAW files generally provide more flexibility during post-production. However, high-quality JPEG photographs can also be professionally edited.
What is window brightening?
Window brightening involves balancing the brightness and appearance of windows so that the interior and exterior portions of the photograph look more natural.
What is sky replacement?
Sky replacement digitally replaces the visible sky in an exterior photograph with another suitable sky while attempting to maintain realistic lighting and perspective.
Should I remove cars from property photos?
It depends. Temporary or distracting vehicles may sometimes be removed, but permanent or relevant features should not be removed simply to make the property appear different.
Do I need virtual staging for every empty room?
No. Strategic staging of important rooms such as living rooms and bedrooms may be sufficient depending on the property and marketing objective.
Can property developers outsource photo editing?
Yes. Developers often have large volumes of property images and may benefit from a consistent post-production workflow for marketing campaigns.
How quickly can property photos be edited?
Turnaround depends on image volume, complexity, required services, and the provider's workflow. It is best to confirm delivery expectations before placing an order.
How much real estate photo editing is needed for a listing?
There is no fixed amount. A typical listing may need basic enhancement across all images, with advanced editing applied only where it improves the photograph or solves a specific visual problem.
How can I reduce editing revisions?
Provide clear instructions before editing begins. Mention the property type, intended use, preferred visual style, required services, and anything that must remain unchanged.
Can drone property photos be edited?
Yes. Drone photographs can receive exposure, colour, sky, object-removal, and other suitable post-production adjustments.
Can I outsource my property photos to a professional editor?
Yes. Outsourcing can be useful when you have recurring listings, large batches, tight deadlines, or specialist editing requirements.
20. Conclusion
Preparing your first property listing does not mean every photograph needs to be dramatically transformed.
The most effective approach is usually to start with the fundamentals:
Correct the exposure.
Balance the colours.
Recover useful detail.
Straighten architectural lines.
Keep the property looking natural.
Maintain consistency across the listing.
Then, where necessary, use advanced services such as window brightening, view replacement, sky replacement, object removal, drone editing, or virtual staging.
The key principle is simple:
Edit the photograph, not the reality of the property.
A professional property listing should help buyers understand what they are looking at without creating unrealistic expectations.
For new agents, this approach provides a practical foundation for creating better listing images. As your workload grows, outsourcing real estate photo editing services can also help you save time, maintain consistency, and establish a repeatable post-production workflow.
The right editing partner should understand real estate photography, follow your preferred editing standards, communicate clearly, deliver consistently, and know when an image needs enhancement—and when it is better left alone.
21. Build Better Property Listings with Professional Photo Editing from Voxelhaus Consultancy
Your property photographs are an important part of your listing presentation.
If you have a new property listing, send your original photographs to Voxelhaus Consultancy for professional real estate photo editing and post-production.
Our editing workflow can support:
- Interior photo enhancement
- Exterior photo enhancement
- Colour correction
- Exposure correction
- HDR blending
- Window brightening
- View replacement
- Sky replacement
- Object and clutter removal
- Perspective and vertical correction
- Drone and aerial photo editing
- Virtual staging
- Listing image cleanup
- Consistent batch editing
- Listing-ready image delivery
Whether you are handling one property or managing recurring agency workloads, the objective is to create clean, natural, consistent, and professional property photographs ready for your marketing channels.
Send your property photographs, explain the required editing, and let Voxelhaus Consultancy help turn your raw property images into polished listing-ready visuals.